Table of Contents
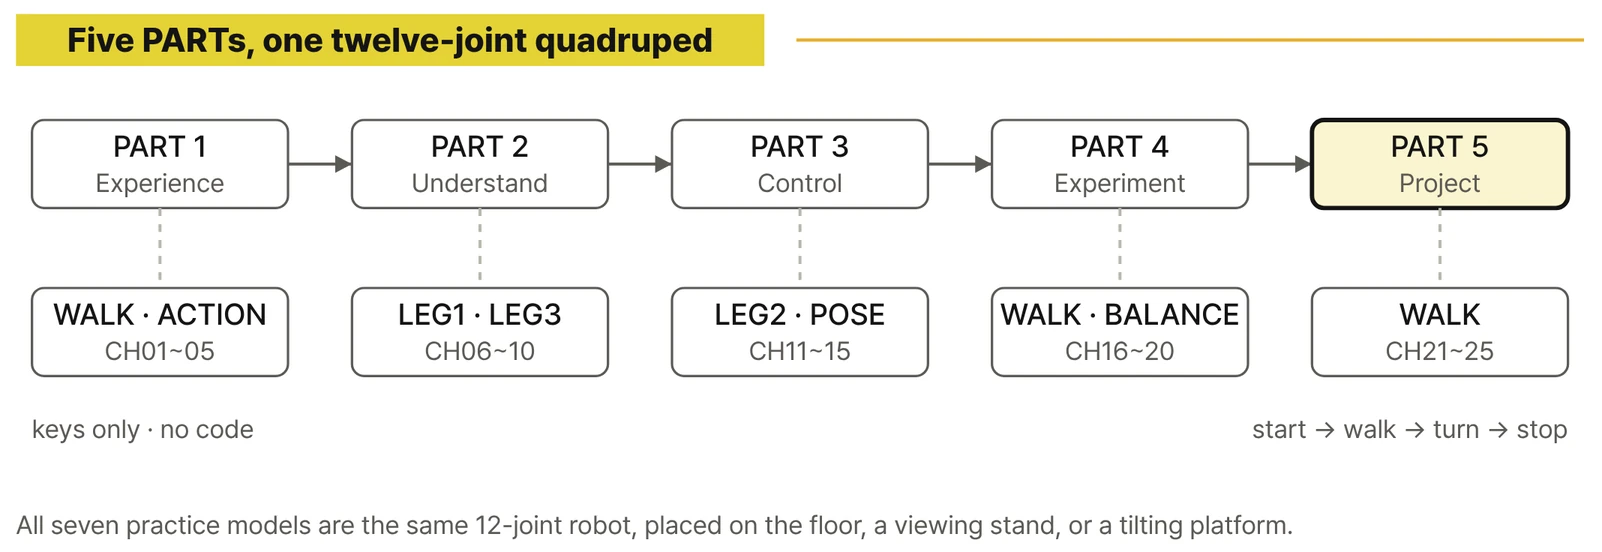
After the prologue, how to use this book, and getting started, the book runs through 5 PARTs and 25 chapters. Each chapter has three hands-on sections and a practice guide box.
Before you start
- What you'll accomplish
The main mission: stand → walk → turn → walk again → stop at the goal - Prologue
What it means to walk on legs instead of wheels - How to use this book
Run the finished gait first, and change only one value at a time - Getting started
Setting up RoboCo and the first run: seven practice models and their start files
PART 1 · EXPERIENCE
Try it hands-on: the quadruped's first steps
No code yet: walk and perform using only WALK's direction keys and ACTION's number keys.
- CHAPTER 01. Get a four-legged robot walking from its first step
1.1 Load the finished QUAD-01 practice robot
1.2 Stand, walk forward, and stop
1.3 Watch the feet move and the body follow - CHAPTER 02. Three poses: stand, sit, and stretch
2.1 Run Stand, Sit, and Stretch
2.2 Pick the next move when a pose finishes
2.3 Spot the differences in waving and stretching - CHAPTER 03. Many ways to walk with the keys
3.1 Learn WALK's six direction keys
3.2 Watch auto modes 1, 2, and 3
3.3 How do step size and speed look? - CHAPTER 04. Walking forward, turning, and stopping
4.1 Walk forward, turn, and stop
4.2 Change the way the body faces
4.3 Stop and pick up control again - CHAPTER 05. Free play
5.1 Pick a favorite move in WALK
5.2 Pick a favorite performance in ACTION
5.3 Get used to both robots' key styles
PART 2 · UNDERSTAND
Understand the structure: how twelve joints make one step
Check joint axes on one leg on a stand, then map four legs, twelve servos, mirroring, control layers, and coordinate frames.
- CHAPTER 06. How far can one leg move? (three degrees of freedom)
6.1 See a three-joint leg's range
6.2 Check joint axes and directions
6.3 Name the joints after checking the real axes - CHAPTER 07. Four leg positions and the parts connection table
7.1 Set front left, front right, hind left, and hind right
7.2 Check the part names of twelve ServoMotors
7.3 Find a wiring error starting from one joint - CHAPTER 08. Same angle, different motion (mirroring and direction)
8.1 See the same angle move legs differently
8.2 Set left and right legs as mirror images
8.3 Fix a leg that moves the wrong way - CHAPTER 09. Control layers from servo to gait
9.1 How a ServoMotor moves a joint
9.2 How joints make a leg pose
9.3 How four legs make a gait pattern - CHAPTER 10. Making all four legs face the same way (coordinate frames)
10.1 Check the X, Y, Z axes and the origin
10.2 Separate body coordinates from each leg's coordinates
10.3 Read foot positions in one shared frame
PART 3 · CONTROL
Control values and actions: shape a pose by moving the feet
Foot targets and IK, computed versus actual pose, workspace and joint limits, and the posture of four legs and the body.
- CHAPTER 11. Changing foot targets
11.1 Find FOOT_X, FOOT_Y, and FOOT_Z
11.2 Move the foot one axis at a time
11.3 Compare the target and the actual foot motion - CHAPTER 12. Letting the robot work out its leg angles (IK)
12.1 How leg lengths relate to joint angles
12.2 Turn a foot target into joint angles
12.3 Trace IK so it isn't a hidden calculation - CHAPTER 13. Comparing computed angles with the actual leg pose
13.1 Check IK inputs and outputs
13.2 Send computed angles as ServoMotor commands
13.3 Compare computed values with the real pose - CHAPTER 14. Knowing in advance where a leg can't reach (workspace and limits)
14.1 Find targets a leg can reach
14.2 See what happens with an out-of-range target
14.3 Keep the order: IK, limit check, command - CHAPTER 15. Changing four legs and the body pose together
15.1 Set all four foot targets together
15.2 Link body height to leg length
15.3 Make roll, pitch, and yaw poses
PART 4 · EXPERIMENT
Change conditions and compare: find a steadier walk
Change height, tilt, transition speed, foot path, stride, and gait cycle one at a time. The IMU/PID tilting platform is optional.
- CHAPTER 16. How steadily does it stand at different heights?
16.1 Stand low, standard, and high
16.2 Compare joint angles with height above the floor
16.3 Find the steadiest pose - CHAPTER 17. Comparing body tilt and turn
17.1 Change side-to-side tilt (roll)
17.2 Change front-to-back tilt (pitch)
17.3 Split foot positions in a turned pose (yaw) - CHAPTER 18. Comparing how fast poses change
18.1 Build stand, sit, and stretch poses
18.2 Change the time a pose change takes
18.3 Compare fast changes with safe ones - CHAPTER 19. Foot paths of standing legs and moving legs
19.1 Tell standing legs from moving legs
19.2 Build lift, carry, and set-down paths
19.3 Compare foot lift height with landing results - CHAPTER 20. Comparing stride, speed, and gait cycle
20.1 Change only the stride
20.2 Change only speed and gait cycle
20.3 Compare distance, tilt, and number of falls
PART 5 · PROJECT
Finish and improve the mission: a walking mission
Gait cycle and leg order, walking forward and back, turning, and recovery, then repeat and improve the final mission.
- CHAPTER 21. Building the gait cycle and leg order
21.1 Set the standing and moving order in one step
21.2 Set the order the four legs move in
21.3 Follow the four legs through the run log - CHAPTER 22. Walking forward and backward
22.1 Reverse the direction of the foot path
22.2 Choose values for walking forward and back
22.3 Connect starting and stopping - CHAPTER 23. Turning left and right
23.1 Make a left-right stride difference
23.2 Compare body rotation and turning radius
23.3 Sequence a straight walk followed by a turn - CHAPTER 24. Getting a fallen robot walking again (errors and recovery)
24.1 Find wiring, direction, and angle errors
24.2 Find IK, joint-limit, and foot-path errors
24.3 Stop safely, stand up, and run again - CHAPTER 25. The final walking mission
25.1 Stand, walk, turn, walk, and stop
25.2 Record the completion rate over repeated runs
25.3 Check the improvement before and after a change
To finish
- Epilogue
How twelve joints became one step - Appendix A Quick reference for running and connecting
- Appendix B Key maps by model, and rules for stop, return, and quit
- Appendix C IK workspace, joint limits, and exception record sheet
- Appendix D Experiment record sheets and the final mission checklist
- Appendix E Gait tuning values and a walking troubleshooting table
- Appendix F Joint, coordinate, and gait terms and units